Welcome to the home of...

Taillight Security Screws
Light Keeper™
|
|---|
Light Keeper™ Installation for Jeep Wrangler is discontinued. Sorry. |
Sorry, the Light Keeper™ for Jeep taillight guard protection is discontinued. This page remains for reference.
Check out the tutorial that follows to see for yourself, or click HERE to see a 3 minute video on installation.
Note: Each Light Keeper™ security kit is sold separately. Each kit will protect a pair of taillights guards.
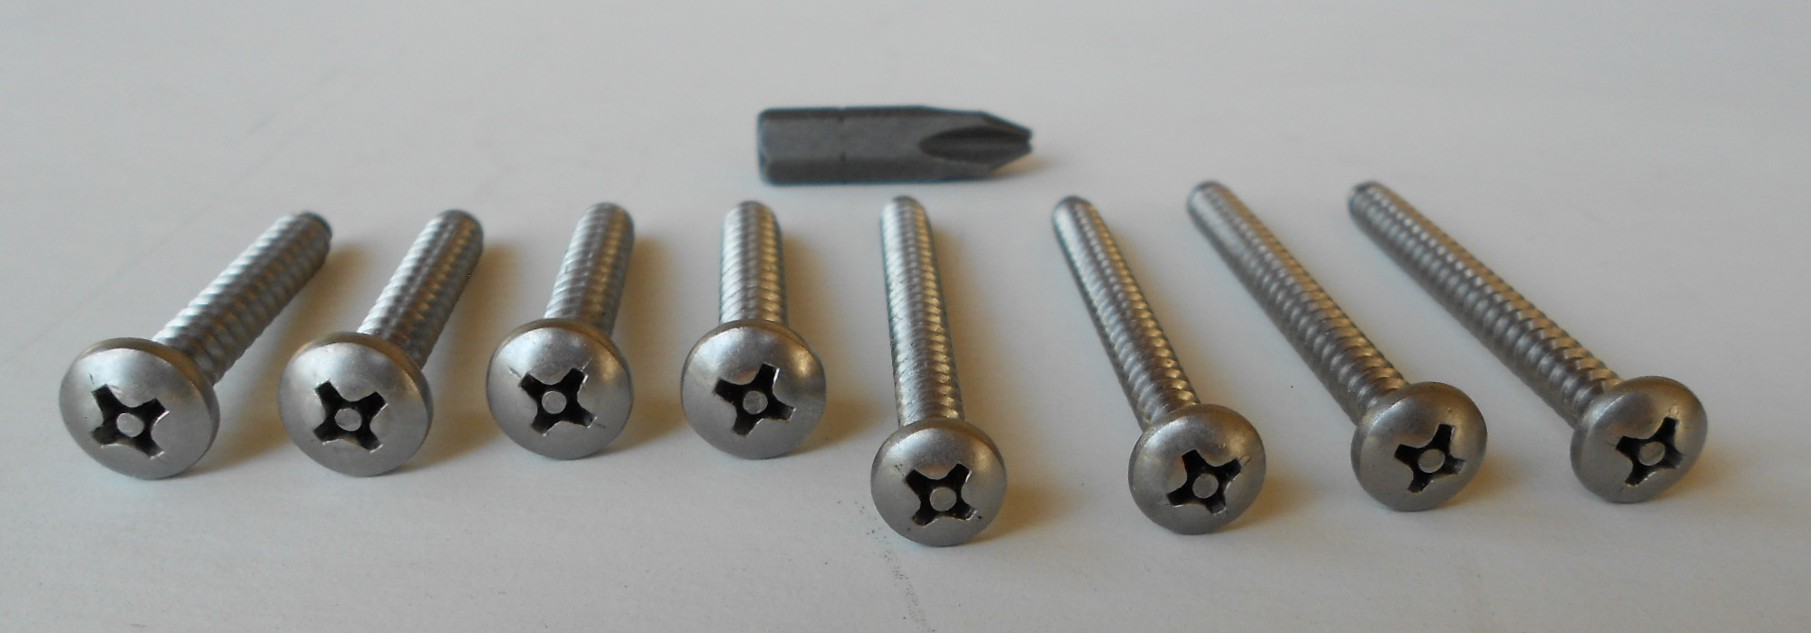 |
Light Keeper™ for Jeep tutorial.1. Check package contents. You should have:
|
|||
|---|---|---|---|---|
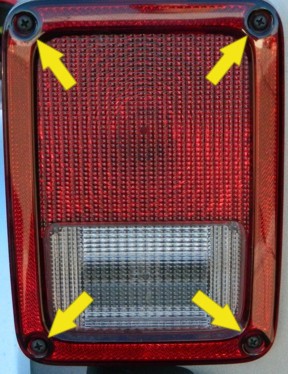 |
2. Locate and remove the factory screws holding your taillights in place.
|
|||
 |
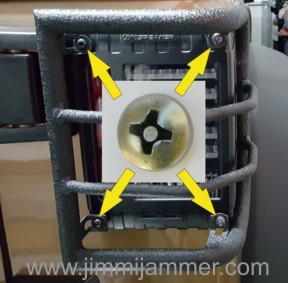
3. Taillight is fastened to Jeep body using 2 screws located nearest the cargo door. (Driver side of vehicle shown here.) Replaceable metal inserts are used to accept the screws without threading directly into body. To ease replacement screw installation, we recommend enlarging the insert hole to 5/32". Use a drill to enlarge these two holes*.
|
|||
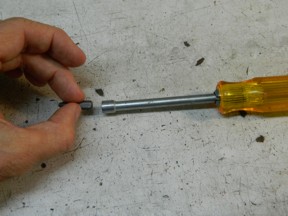
 Set the bit in each screw head before attempting to thread the screw into the hole. Very important! |
4. Very important! The bit fits very tightly into the screw head. Before attempting to install a 2 1/2" long screw, set the bit into the screw head. To do this, put the bit into the screw head with your fingers. Then, tap the base of the bit on a hard surface to set the bit into the screw. This will prevent the bit from slipping out of the screw head when torque is applied. Do this for each 2 1/2" long screw before putting the screw into the hole. |
|||
 |
5. Insert the provided security bit with the screw set on it into 1/4" socket or nut driver.
DO NOT USE A POWER DRIVER TO THREAD THE SCREWS IN TO THE BODY! Due to the head size on the screw, the bit has rather thin walls in order to fit. Enlarging the holes in the metal clips, setting the bit into the screw and using only hand power to insert will help reduce the risk of bit breakage. If you encounter resistance threading the screws into the body clips, carefully thread in only 1/2 turn or so, then back out and go in a bit farther. Work in and out a couple times and you will feel the resistance lessen. |
|||
|
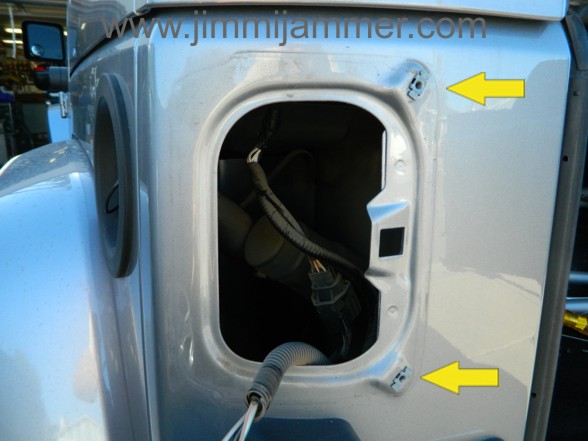
Passenger side of vehicle shown here 5. Insert a longer (2 1/2") security screw into each screw hole nearest the cargo door, 2 places. Thread screws in just enough to hold everything in place. |
|||
 |
Passenger side of vehicle shown here It is not necessary to enlarge the screw holes on this side. The screws thread into plastic only. 6. Insert the shorter (1 1/2") security screws into the holes nearest the side of the vehicle. 2 places. Carefully tighten all 4 screws. Remember that the light assembly is plastic so avoid over tightening. |
|||
|
That's it! Now repeat the process on the other taillight. 6. Store the installation/removal tool in a safe place. You will need it if you ever need to change a bulb on your light. Now your taillight cages or guards are safe from thieves! Questions? Contact Us
Ready to buy or check prices? Click Here |